Unique Hair Bows
"How to make hair bows"
"How to make hair bows for dogs" is a question often asked. It is not complicated but having limber fingers will sure help the process. Naturally you will feel clumsy at first but after you make a few you will have no problems.
There are a number of ways to make those cute bows the groomers use for dogs. Here we are going to give directions to make a basic bow. You can add ornaments if you choose to dress it up.
Dog hair bows
We have all seen the cute bows that the groomers use. Than there are the fabulous ones the show dogs have. Oh yes they are the double bows with glitter and adorn the dogs with the perfect grooming completed. But most of us don’t do the dog shows but still want some cute bows for our furbabies.
Dog hair care
You can use these simple instructions and add whatever adornment you want to dress them up. Choose different size ribbon; add buttons, glitter, beads or charms. Make a bow with two different ribbons, using contrasting ribbon and one a bit smaller than the other. So many ways to adorn these you will only be limited by your imagination.
These instructions on how to make a bow for your dog will give you a couple of ways to try. Find the one that works best for you. There are single bows that work great for the ears or top knot but the double bows are the best choice for the top knot. So here are some simple instructions on how to make hair bows.
A few more ideas could be contrasting colors of ribbon between loop and flag (the straight ribbon piece behind the loops). Or you can glue adornments to the center and use two pieces of ribbon on loop (remember to make the outside ribbon more narrow).
I have seen some really cute little crocheted flowers added to colorful ribbon. These hair bows are very expensive, so if you can crochet you can save a ton.
How to make hair bows (1)
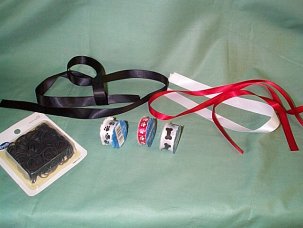
You will need Stiffy Stuff (can be purchased at your local craft store)
Ribbon,
Stretchy bands
Scissors.
Cut two pieces of ribbon size will depend on bow wanted. Cut one piece a bit longer than the other.
1. Make a single loop around three fingers
2. Fold and snip a V on either side of center (just as you would for the multi-loop bows).
3. Take a second piece of ribbon (straight piece slightly longer than the original loop) fold and snip a V in the center as well.
(Step four is the tricky part because the rubber band has to be wrapped around)
4. Lay the straight piece behind your loop and wrap with a rubber band like a slipknot. This is where you lay the rubber band on top of bow and pull one end through the other side of band)
5. Spray bow with stiffy stuff, you can place a small round item inside each side of loop to shape while drying.
6. Now is the time you might want to add some variety to the bows. You can add some items to dress up your bow, such as beads, buttons and flowers.
How to make hair bows (2)
First place a small rubber band on a hemostat and set aside.
1. Take three fingers, and hold them together like a scout salute.
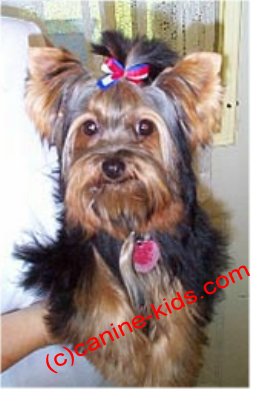
(For Yorkie top knots just use two fingers and don't do the notch. Everything else is the same).
2. Now holding your hand palm up, lay two colors of ribbon across your fingers starting at your ring finger, and wrap two times, ending at the edge of your index finger.
3. Clip the ribbon on the diagonal.
4. Slip loops off your fingers, being careful not to let them get loose.
5. Hold them together in the middle, and fold in half carefully, taking care not to crush the ends of the loops.
6. Take a small notch at both corners of the fold, about a third of the way in. This is to help the loops fluff out nice.
7. Open up the fold just enough to lay the notched part across the hemostats, above the band.
8. Take the band, twist it, and loop it over the tip of the hemostat. Flip it and pull the bottom of the band over the top of the hemostat.
9. Take your fingers, and pull the inner loops out from the center, giving them a little twist to help them stay out. This is what the notches are for.
10. Alternate sides and colors. Now you should have a really nice looking bow.
It will take some practice, as it requires dexterity working with those little things, but they are fun to do.
(Idea) Take little bits of metallic rickrack or plastic beads and lay them on the ribbon before pulling the band over. Puts it right in the center and is so cute! Make those the length of your three fingers, not looped.
You can find many of your ribbon at JoAnns
Hair Bows to Dog Clothing
Hair Bows to Dog Hair Care